Put the DynamoAmp amplifier on any levelled surface in only an upright position.
- Using rack mounting brackets:
Screwed the rack ears on the sides of the amplifier, then you can mount it on any 2U size rack. Keep it levelled on the rack.
2
CONNECT THE SPEAKERS
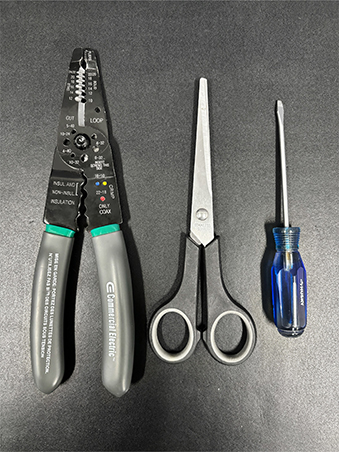
1. Prepare wire strippers, scissors and small screwdriver.
2. Drag out the terminal block from the amplifier.
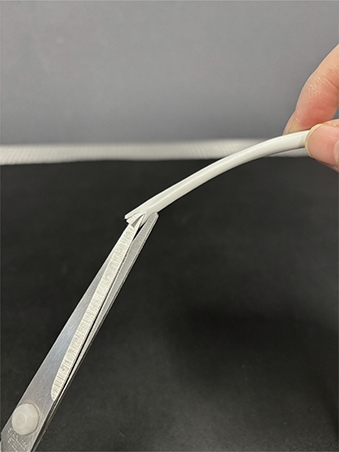
3. Cut the insulation of the speaker wires and peel it to expose around 2 inches of the wires.
4. Cut off the excess insulation.
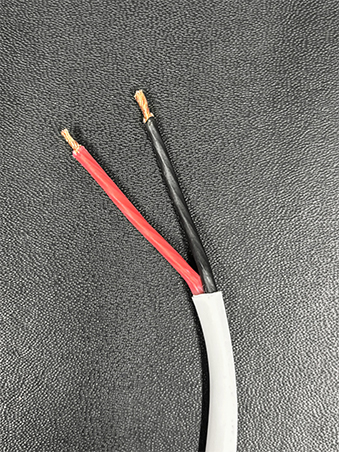
5. Strip around 0.25 inch of insulation from each wire and twist the wire strands.
6. Insert wire in the terminal box and tighten the screw. Make sure it does not loosen up from pulling.
7. Repeat the steps until you install all the zones you need.
8. Plug back the terminal blocks.
2
CONNECT THE SPEAKERS
1. Prepare wire strippers, scissors and small screwdriver.
2. Drag out the terminal block from the amplifier.
3. Cut the insulation of the speaker wires and peel it to expose around 2 inches of the wires.
4. Cut off the excess insulation.
5. Strip around 0.25 inch of insulation from each wire and twist the wire strands.
6. Insert wire in the terminal box and tighten the screw. Make sure it does not loosen up from pulling.
7. Repeat the steps until you install all the zones you need.
8. Plug back the terminal blocks.
3
CONNECT TO THE NETWORK
Connect the power supply to the amplifier and turn it on. Wait for approximately 30 seconds.
Option 1 (Optimal) - Wired Connection
1. Utilize a wired connection by attaching the Ethernet Cable to the LAN input port at the back of the amplifier. 2. Ensure your mobile device is connected to the same WiFi network as the amplifier.
Option 2 - Wireless Connection
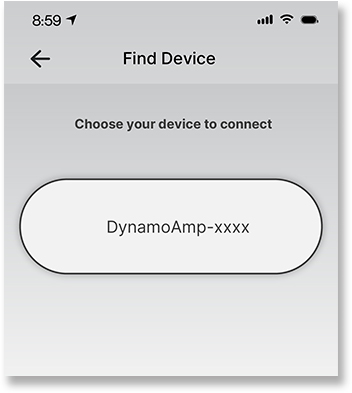
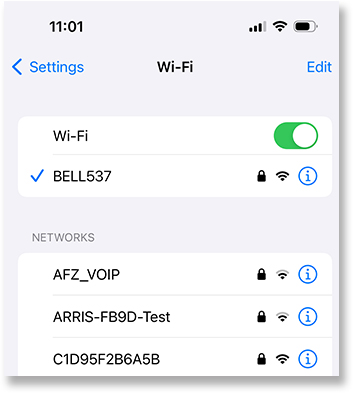
1. Access to WiFi settings on your mobile device and connect to the network named “DynamoAmp-xxxx” using the password “12345678”.
2. Open the Dynamo mobile application, select your amplifier from the available list, and click “Connect.” You will be directed to the WiFi settings page.
3. On the WiFi settings page, click “Scan” and select your preferred network, enter the pass word and click “Apply”. The app will be closed automatically once you connect successfully.
4. Wait for 60 seconds, then check your device’s WiFi settings again. If you still see “DynamoAmp-xxxx”, repeat from step 1. If “DynamoAmp-xxxx” disappears, you just need to connect to the same WiFi network as the amplifier and reopen the app. It’s now connected to the network.